Everyone has the photos. The gap between a camera roll and something people actually watch is about ten minutes of work — if you avoid the one trap that stops most phone slideshows dead.
This guide covers the whole thing on an iPhone: choosing photos, adding music you are allowed to export, making stills move, and getting it out at the right size for wherever it is going.
Table of contents
- The music trap nobody warns you about
- Apple's built-in Memories vs. a real slideshow editor
- Step 1: Choose the photos (and how many)
- Step 2: Set the shape before anything else
- Step 3: Add the music
- Step 4: Make the stills move
- Step 5: Transitions, used sparingly
- Step 6: Titles
- Step 7: Export
- How long should it actually be?
The music trap nobody warns you about
Here is the thing that wastes most people's evening: you cannot export a video with a song from Apple Music or Spotify in it.
Those tracks are DRM-protected streams licensed for listening, not for including in a file you save and send. Apps that let you pick from your streaming library are generally letting you play it back inside that app — the moment you export or share, the audio is missing, silent, or the export is refused.
So you have exactly three legitimate options:
- A track from the app's own licensed catalogue. Moments and Muse ship 40 licensed tracks cleared for commercial use — meaning you can publish the result, including on a monetised account, without a claim
- Audio files you actually own, sitting in Files on your phone — a purchased MP3, something a friend recorded for you
- Your own voice. More on that below, and it is better than people expect
If a guide tells you to "just pick any song from your library", it has not tested the export.
Apple's built-in Memories vs. a real slideshow editor
The Photos app makes slideshows automatically, and for some jobs that is genuinely enough.
| Photos Memories | A slideshow editor | |
|---|---|---|
| Effort | None — it builds itself | Ten minutes |
| Photo order | Chosen for you | Yours |
| How long each photo holds | Fixed | Per photo |
| Music | Apple Music, so exports are restricted | Licensed tracks you can publish |
| Titles | One, at the start | Anywhere, 46 fonts |
| Voiceover | No | Yes |
| Export size | Limited | 720p to 4K, several shapes |
Use Memories for something you will watch once on your own phone. Use an editor for anything you are sending to family, playing at an event, or posting.
Step 1: Choose the photos (and how many)
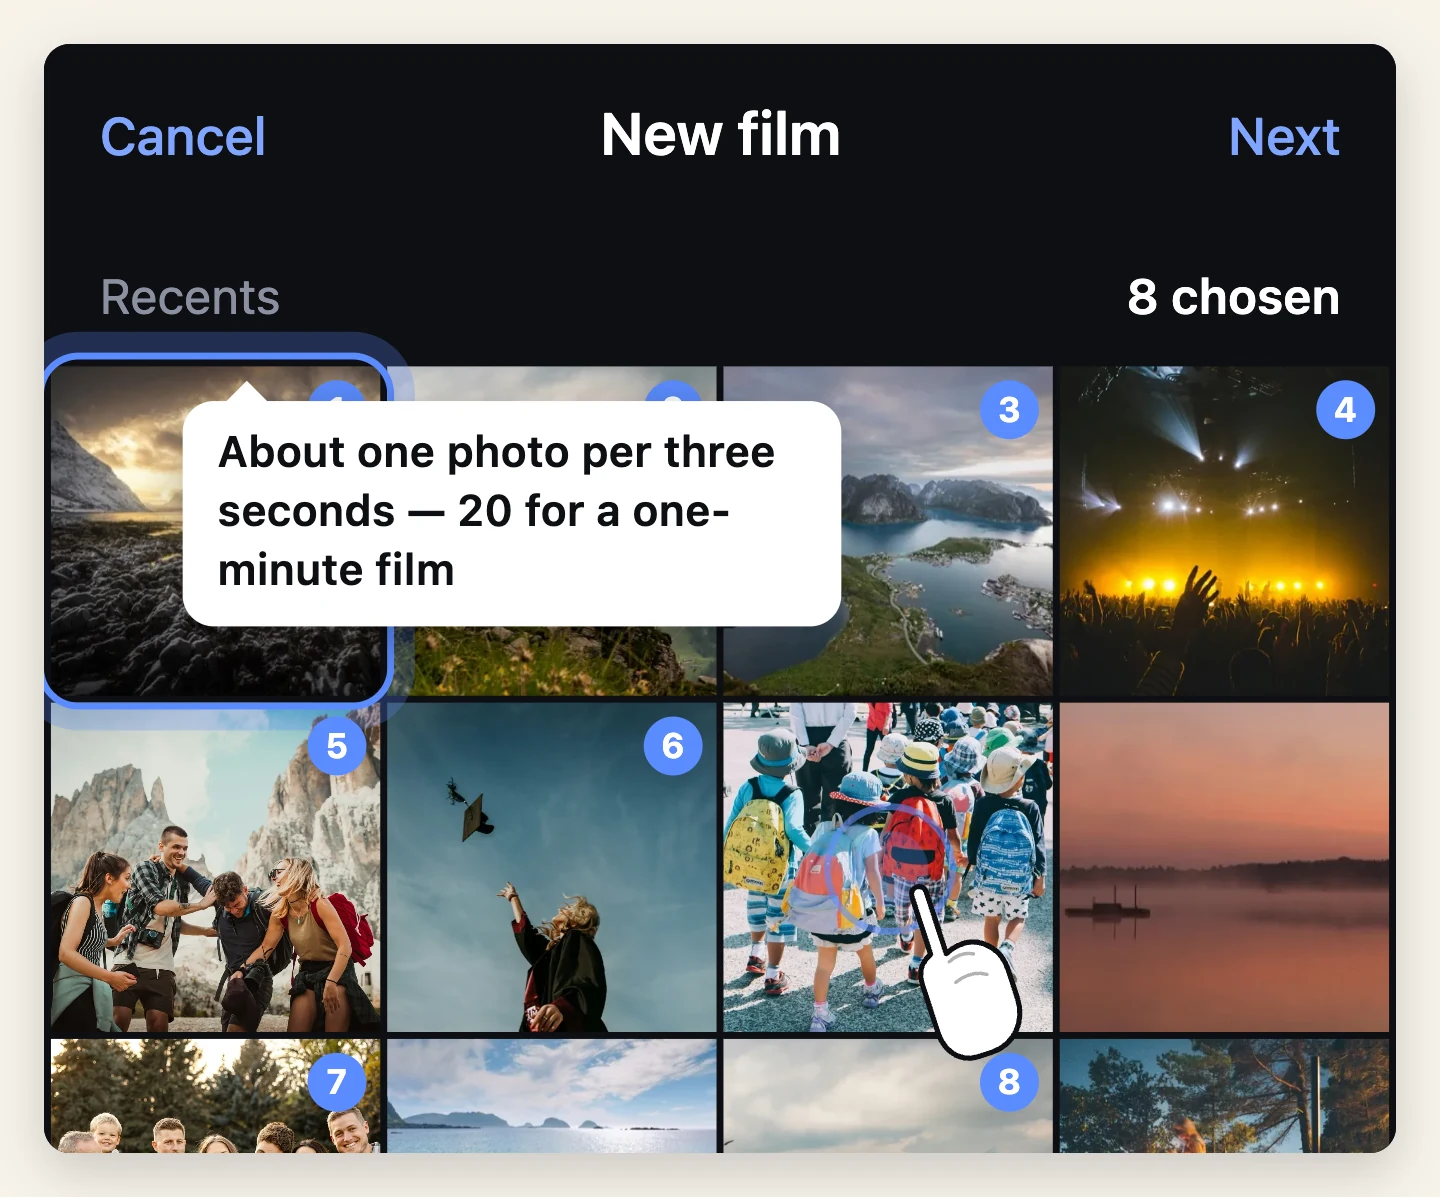
Open Moments and start a new project. It opens straight into the picker — no account, nothing to sign up for.
The rule that matters: choose fewer than you want to. The instinct is to include everything. The result is a film nobody finishes.
A workable ratio is roughly one photo per three seconds. So:
- A 1-minute film — about 20 photos
- A 3-minute film — about 60 photos
- A 5-minute film — about 100, and you are now asking a lot of the audience
Cut anything that is nearly the same as the photo next to it. Three shots of the same pose is one shot.
[Screenshot: The photo picker — selected photos numbered in the order they will appear]
Step 2: Set the shape before anything else
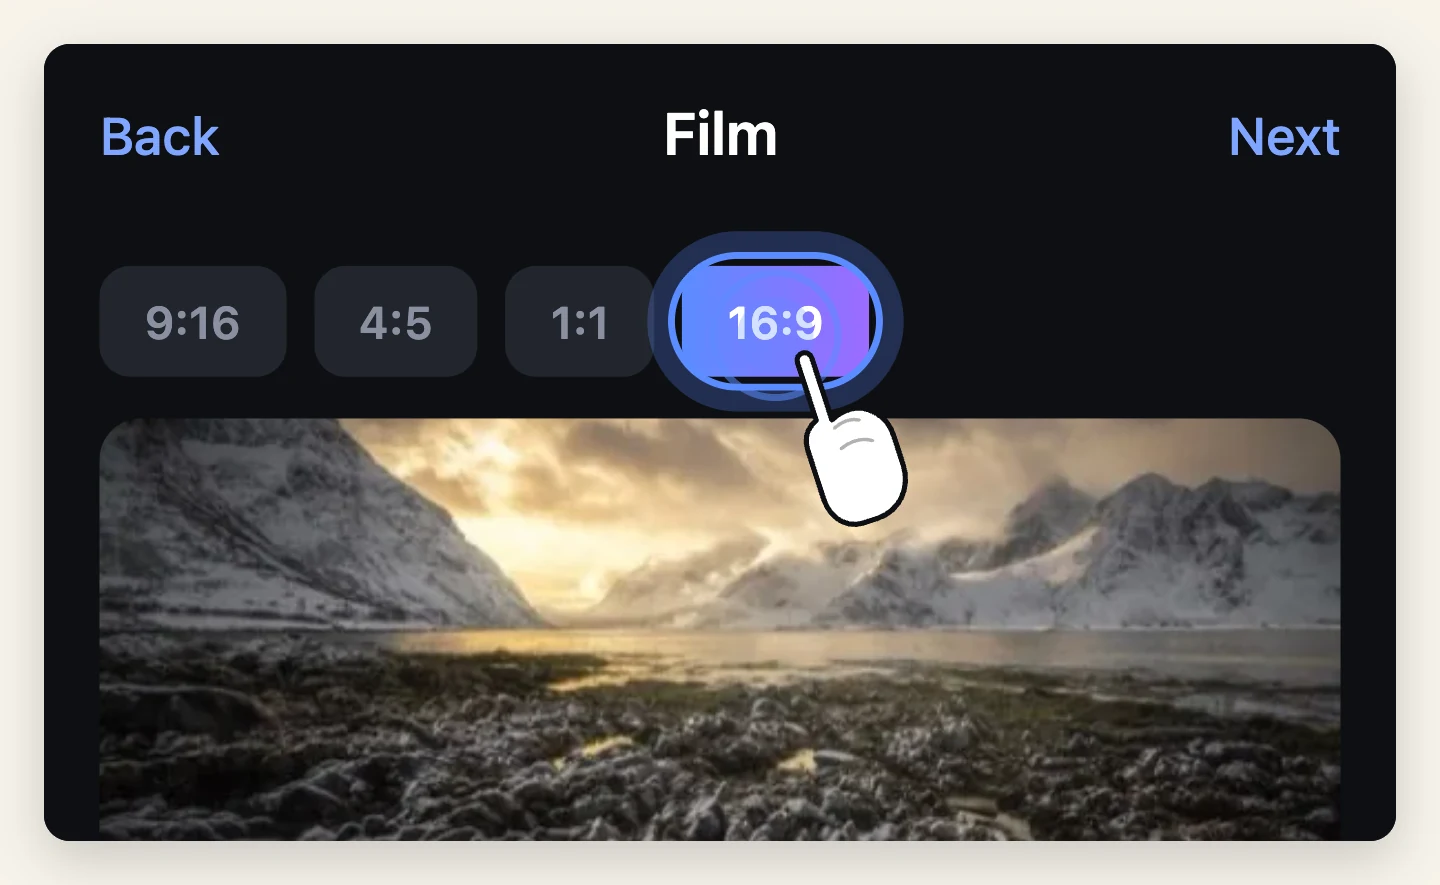
Pick the aspect ratio now, not at the end — it determines how every photo gets cropped.
| Where it is going | Shape |
|---|---|
| Stories, Reels, TikTok | 9:16 |
| Instagram feed | 4:5 |
| A TV at a party, YouTube, email to family | 16:9 |
| Not sure yet | 1:1 |
A portrait photo in a 16:9 film gets heavy side-cropping, and a landscape photo in a 9:16 film loses its edges. If your photos are mixed — and they always are — 1:1 or 4:5 costs the least.
Step 3: Add the music
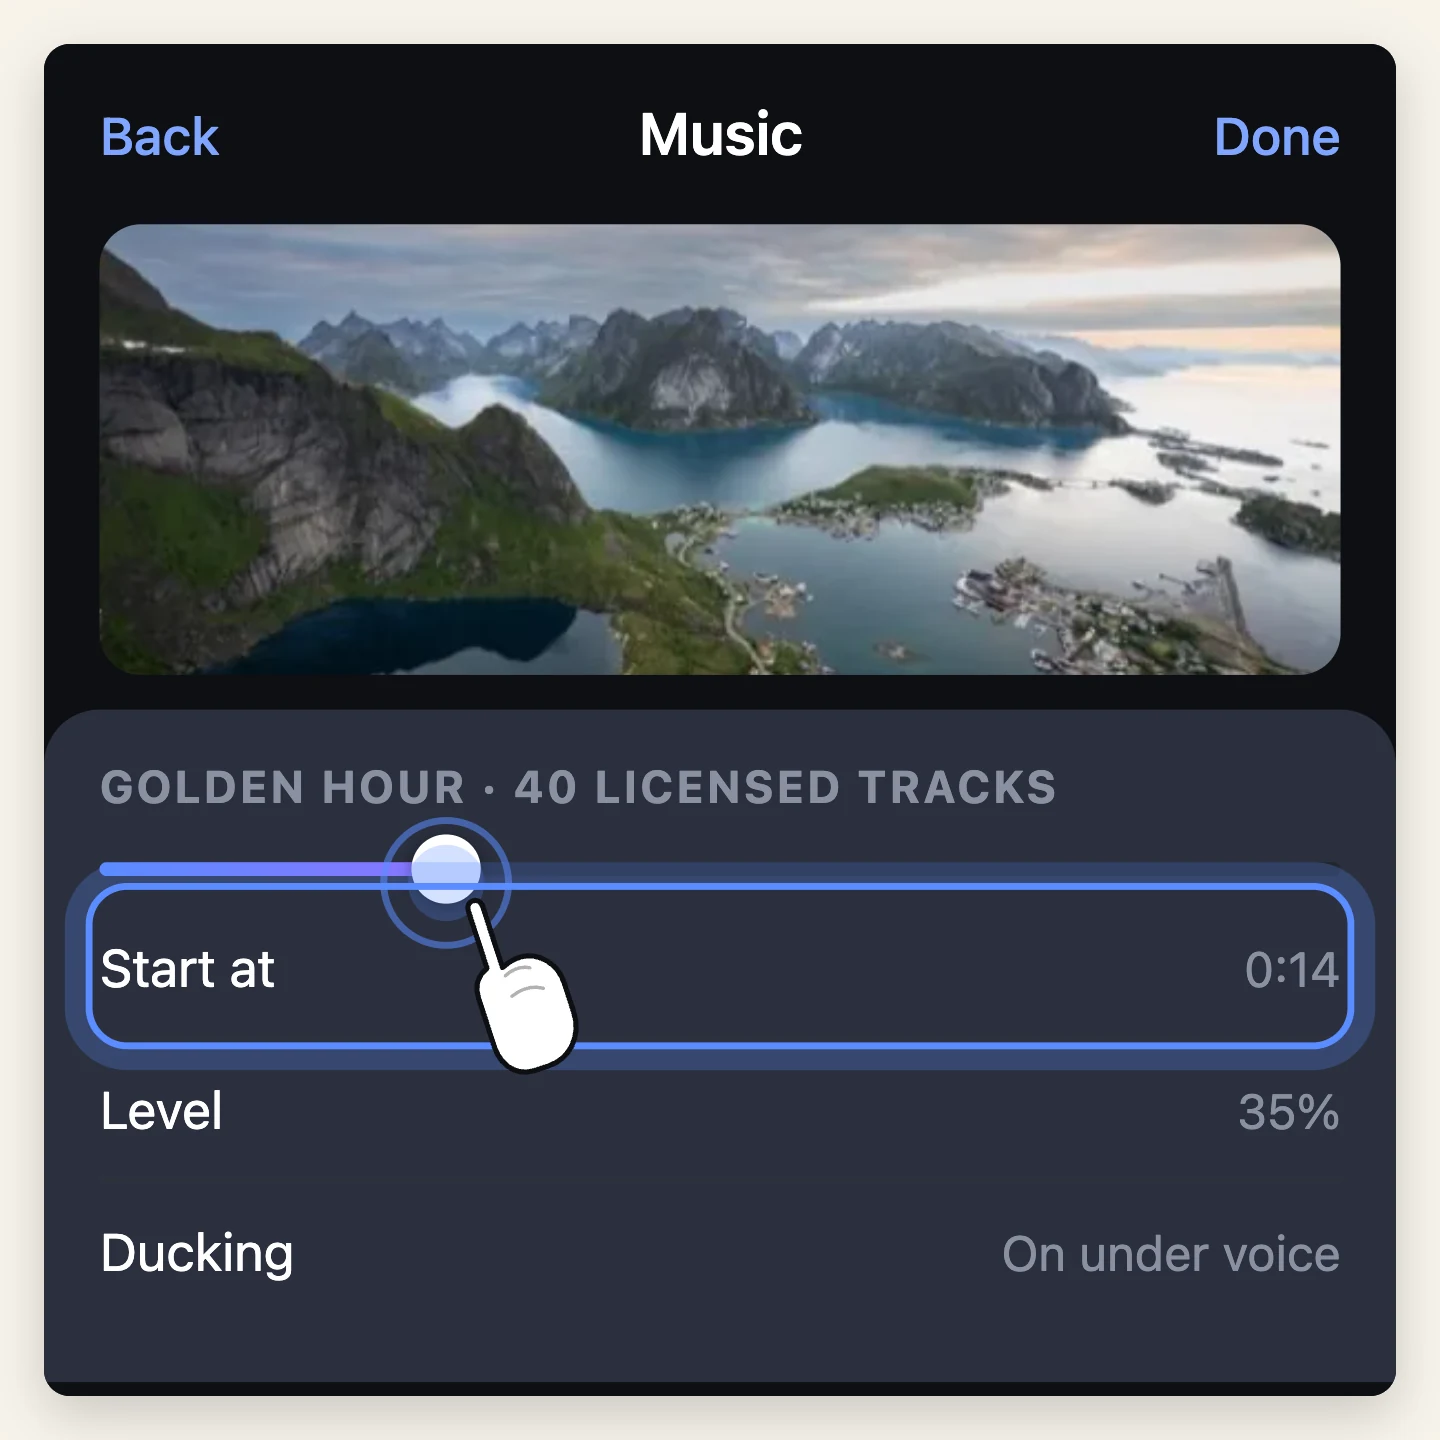
Open the music panel and either pick from the built-in catalogue or load a file you own.
Then do the part most people skip: trim the track. Songs rarely start at their best moment. A slideshow that opens on twelve seconds of intro has lost the room before the first photo lands. Move the start to where the song actually begins.
Set the music level while you are there. If you are adding voiceover, the music ducks under your voice automatically and comes back up when you stop — you do not have to ride the levels by hand.
Add your voice, if the film is for people who knew the day
Recording a voiceover takes one pass. You get a 3-2-1 count-in, then you talk over the pictures as they play.
For a family film this is worth more than any transition. Nobody rewatches a slideshow for the crossfades. They rewatch it because someone said who everyone was.
Step 4: Make the stills move
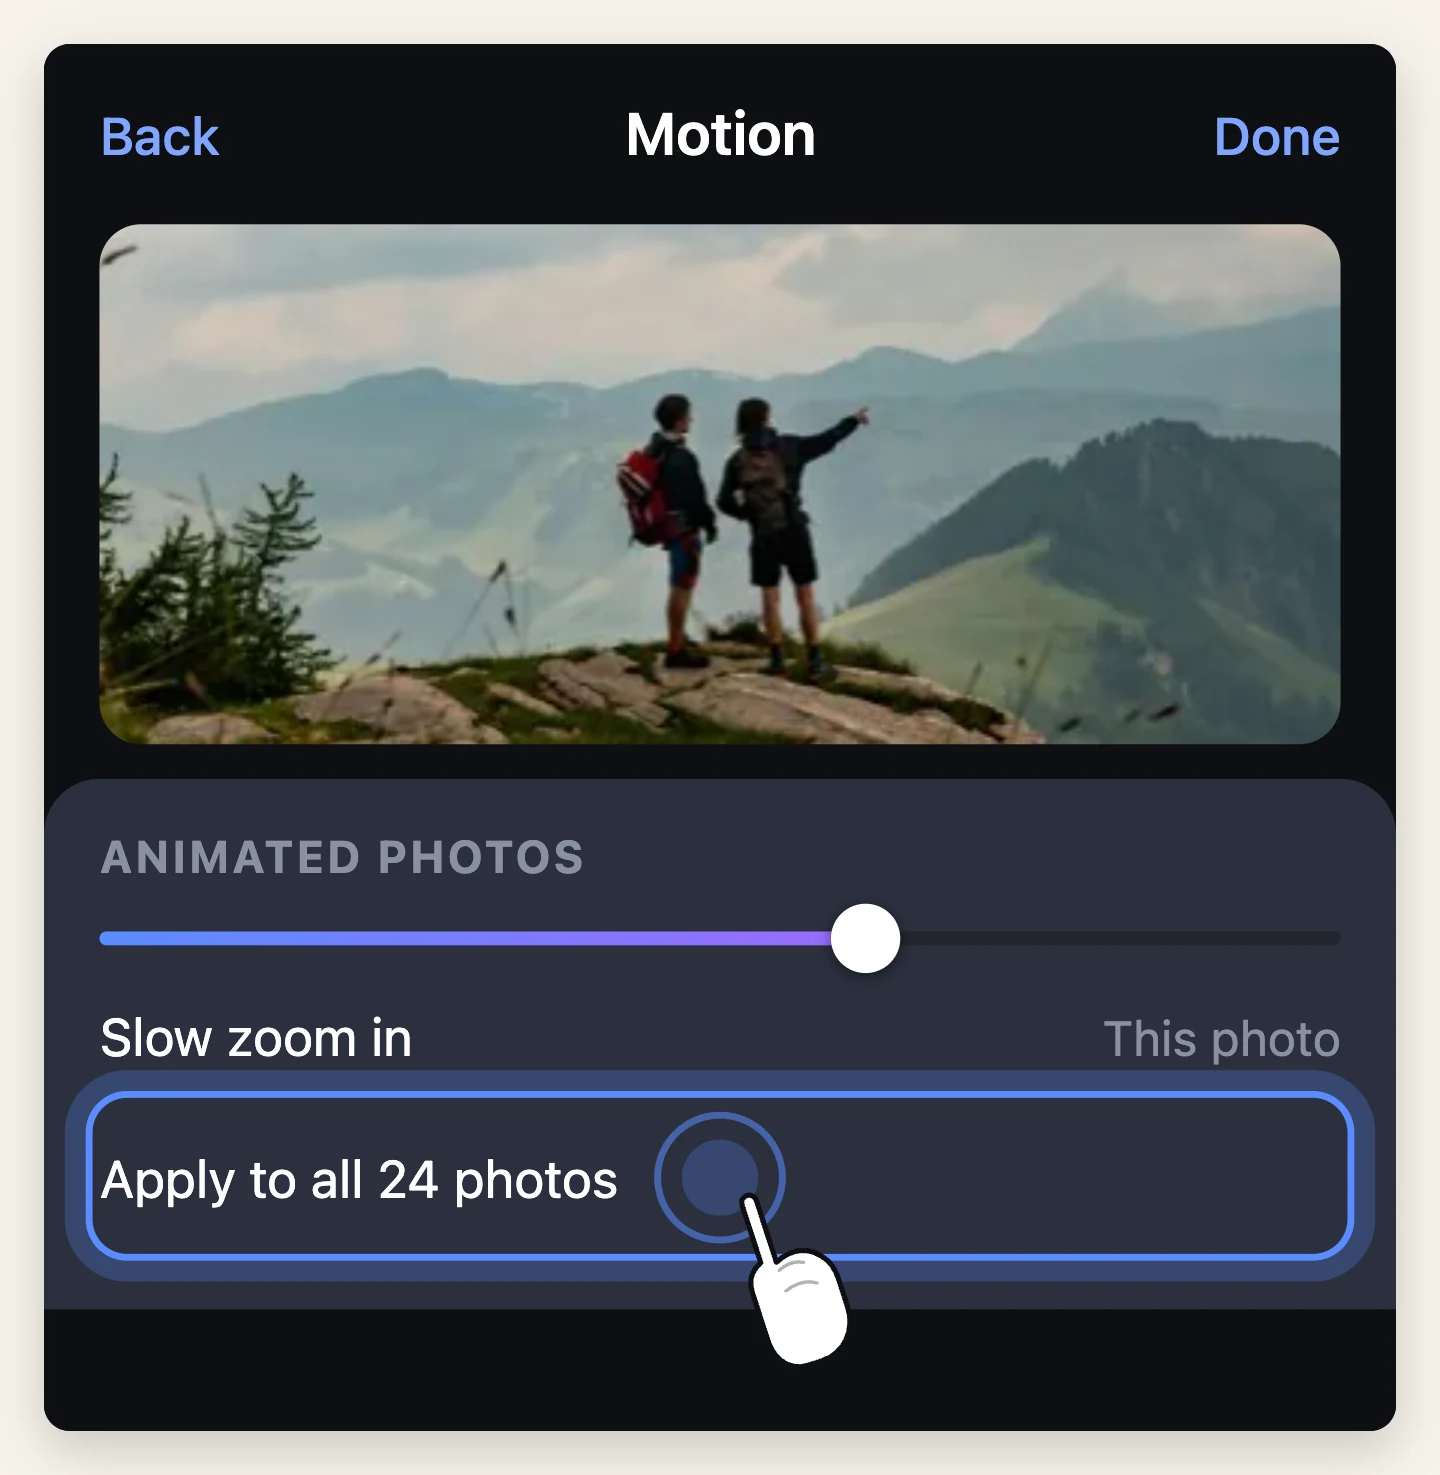
A row of static photos reads as a slideshow. The same photos with a slow push in or a drift across read as a film. It is the single highest-impact setting in the whole app.
Each photo can take its own slow zoom or pan, or you can apply the same motion to all of them at once. Start with apply-to-all, then fix the handful where the movement fights the picture — a photo that pushes in on an empty corner, for example.
Animated photos are part of Pro.
Direction matters more than amount. Pushing in builds; pulling out releases. Use a pull-out on your last photo and the film ends rather than just stopping.
Step 5: Transitions, used sparingly
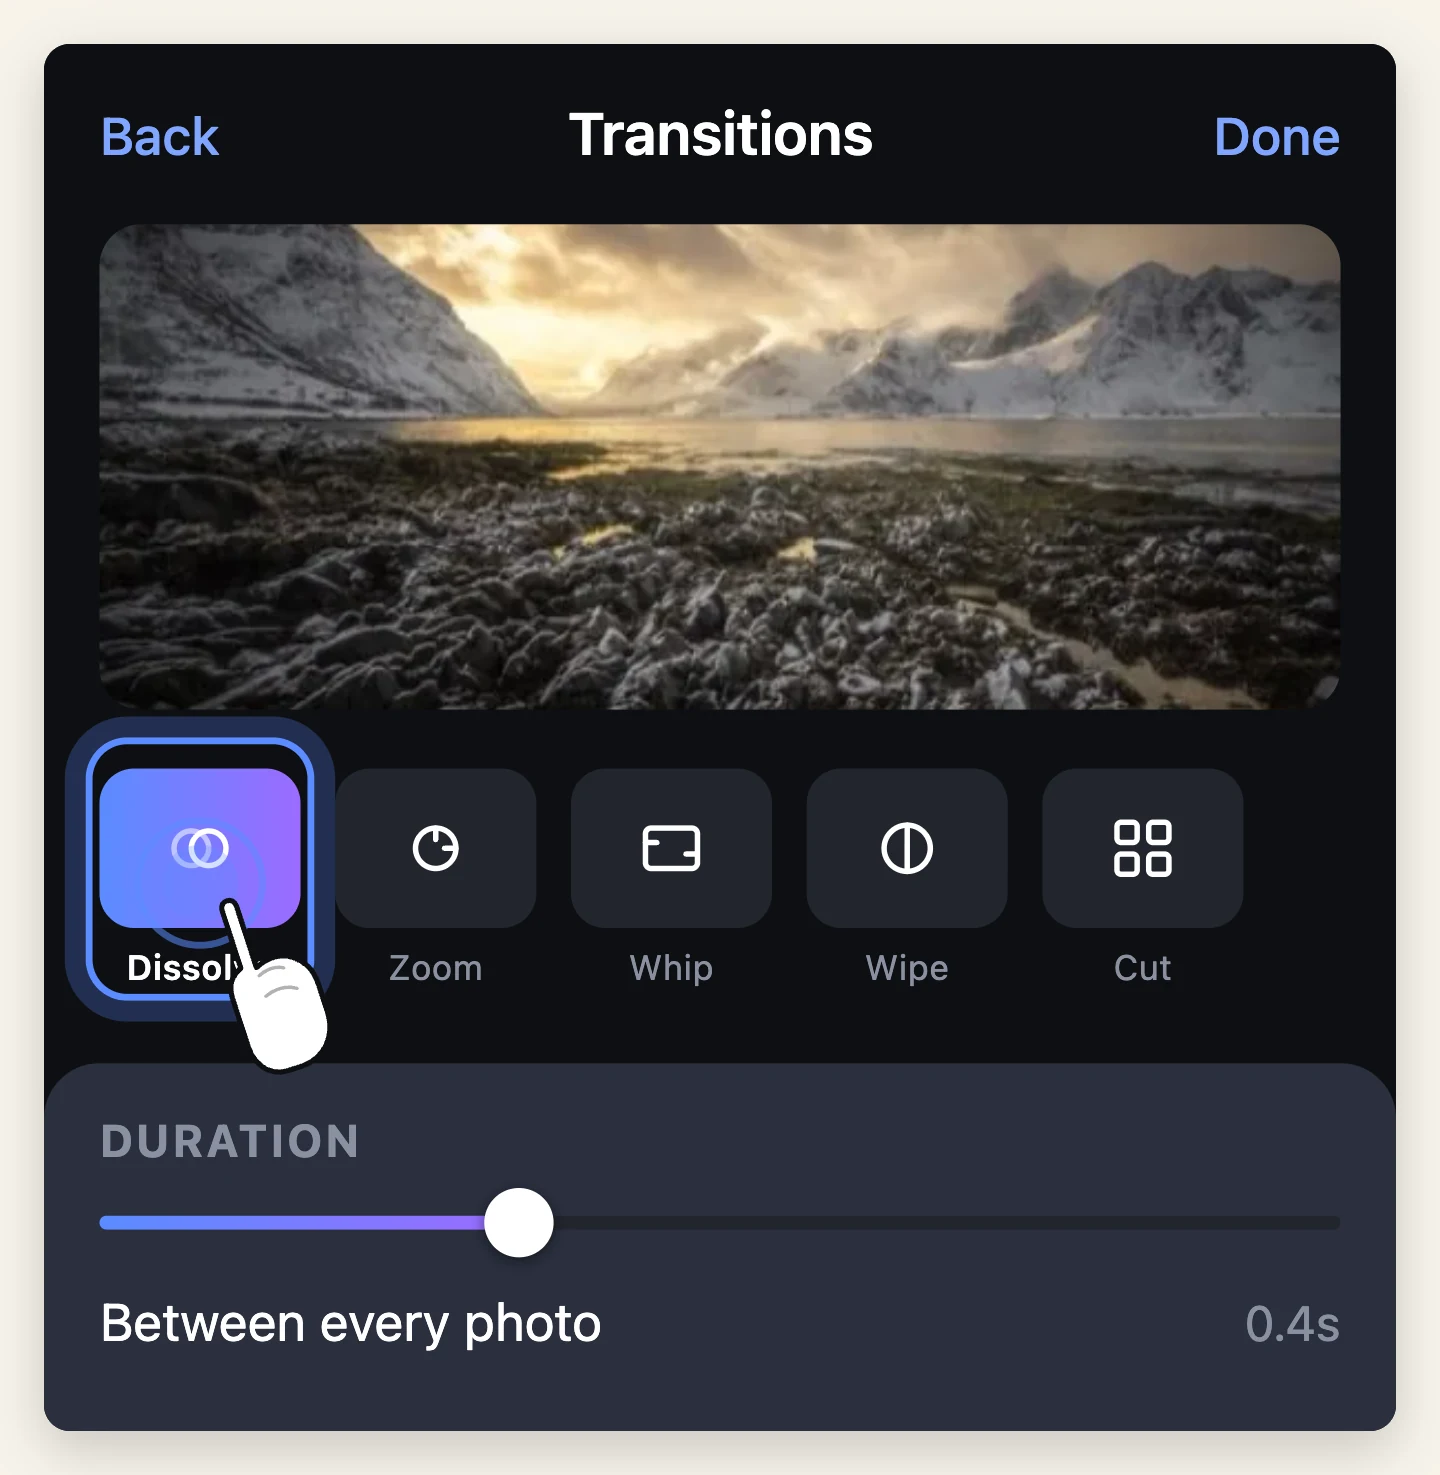
There are 57 transitions. You should use about two.
Pick one default and apply it to every cut — a dissolve is almost always right for photos. Then override it in the two or three places the film changes chapter: a wipe when you move from the ceremony to the party.
A different transition on every cut is the visual equivalent of a ransom note. The duration is adjustable to the frame; for photos, short is better.
Step 6: Titles
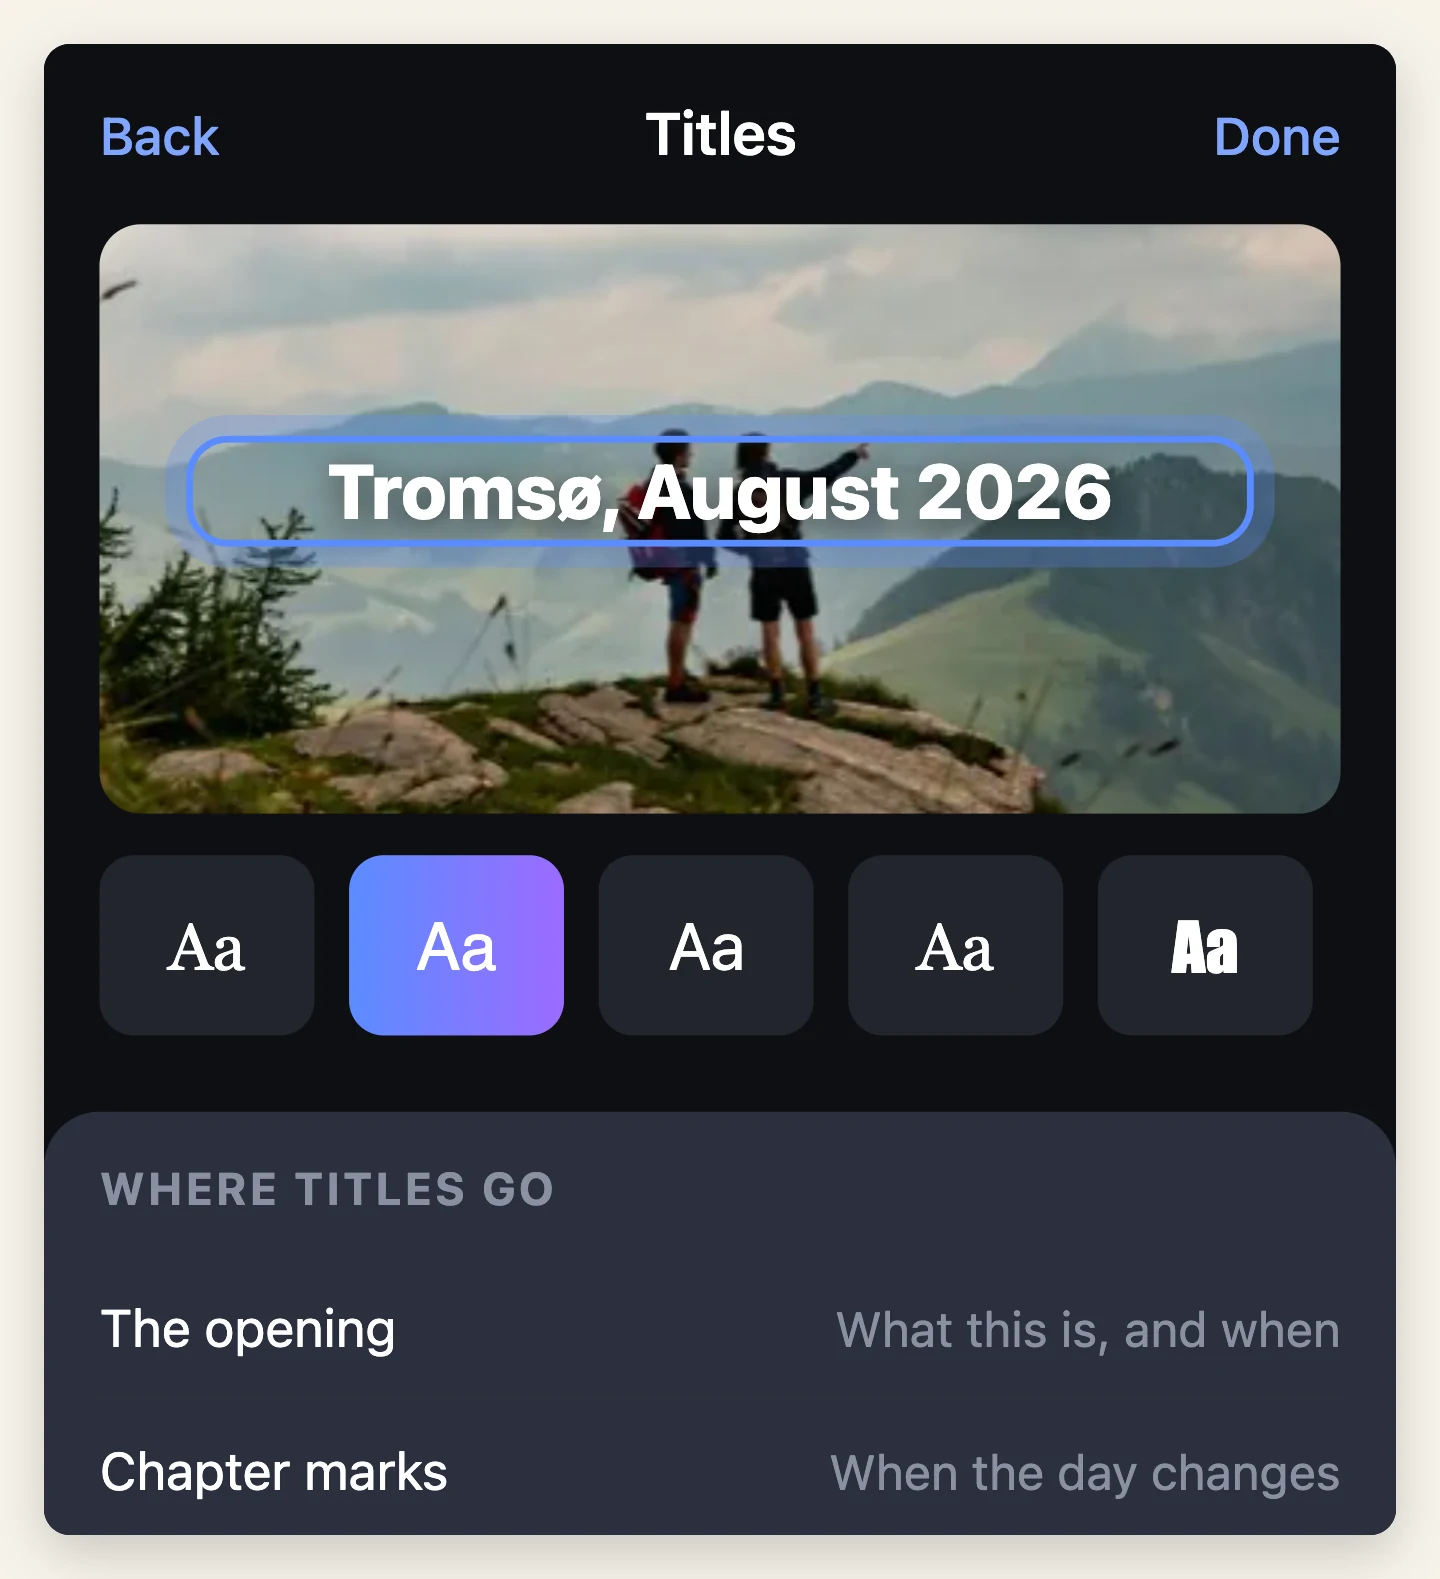
There are 46 fonts, with size, colour and alignment. You need titles in roughly three places:
- The opening — what this is and when. "Tromsø, August 2026"
- Chapter marks — if the film covers more than one day or place
- The end — a name, a date, or nothing at all
Keep every title to one line that reads in under two seconds. If it needs two lines, it is a caption, not a title, and belongs under the photo rather than over it.
Step 7: Export
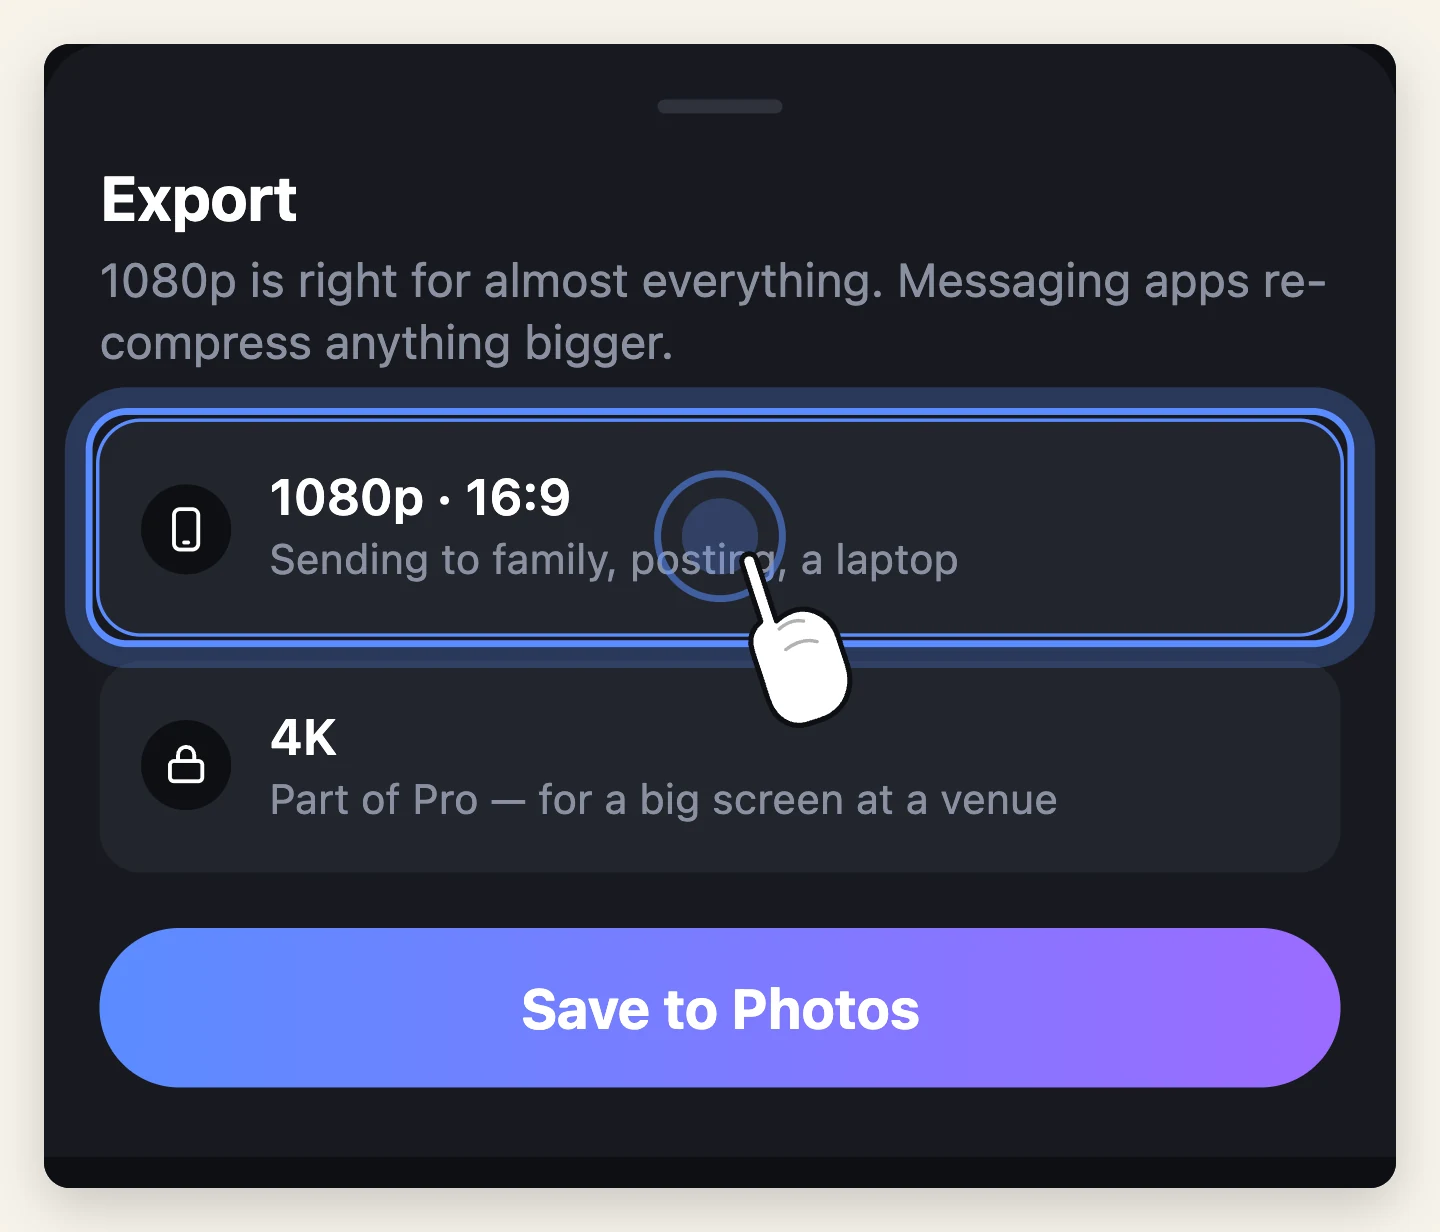
720p and 1080p are free. 2K and 4K are part of Pro, along with unlimited length and the full music catalogue.
What to actually choose:
- Sending to family over WhatsApp or email — 1080p. Messaging apps re-compress anything bigger into mush
- Posting to Instagram or TikTok — 1080p, in the shape you set in Step 2
- Playing on a TV at an event — 4K if the photos are high-resolution, 1080p otherwise. Test it on the actual screen before the day
- Keeping it — the highest you have
The free version adds a watermark. Pro removes it.
How long should it actually be?
Honestly shorter than you think.
- Social post — under 60 seconds, ideally about 30
- Shown at a gathering — 3 to 5 minutes is the ceiling before people start talking over it
- A private family film — as long as you like, but chapter it with titles
The test is simple: watch it once, all the way through, without touching the phone. Every moment you feel the urge to skip is a moment to cut.

Moments
Photo movies set to music — the app this guide is written for.

Free to try. Nothing to sign up for.