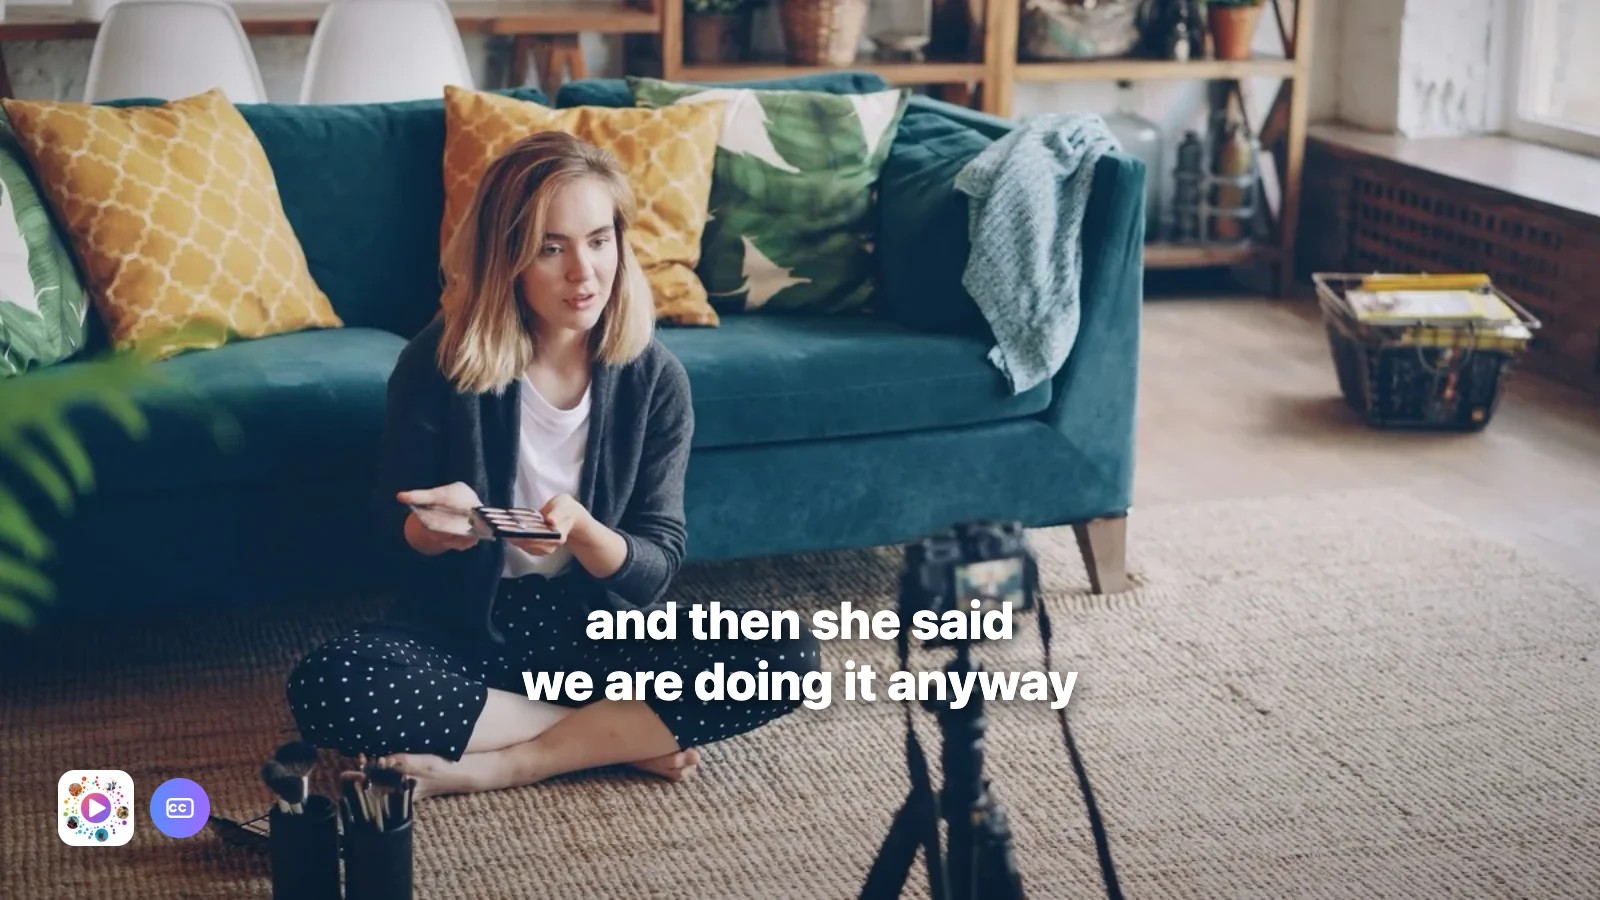
Most caption tools work the same way: you upload your video to a server, their system transcribes it, you download it back. That is fine for a clip of your cat. It is not fine for a client's unreleased footage, a kid's school play, or anything you were told in confidence.
There is another way, and it has been on your phone the whole time. Apple's speech models run on the device. An app that uses them can caption your video without a single byte of your audio leaving the handset.
This guide shows how, what the trade-off is, and where automatic captions still need a human.
Table of contents
- Why captions are not optional any more
- On-device or in the cloud — the real trade-off
- Step 1: Open the project and choose the spoken language
- Step 2: Generate the captions
- Step 3: Fix the words the model got wrong
- Step 4: Style them so they are actually readable
- Step 5: Keep them out of the interface
- Adding more clips later
- When automatic captions are not good enough
Why captions are not optional any more
The numbers people quote vary, but the direction does not: a large share of social video is watched with the sound off, at least at first. A video with no captions asks the viewer to turn on sound before they have any reason to care. Most will not.
Captions also do three quieter things:
- They make the video usable by deaf and hard-of-hearing viewers — reason enough on its own
- They give platforms text to index, which affects what you get recommended for
- They hold attention through the first second, because there is already something to read
On-device or in the cloud — the real trade-off
This is a genuine choice with a genuine cost either way, and you should make it deliberately.
| On this iPhone | Apple's best model | |
|---|---|---|
| Where the audio goes | Nowhere. It stays on the device | Sent to Apple for processing |
| Accuracy | Lower — the on-device model is small | Higher |
| Dialects and accents | Struggles | Better, still not perfect |
| Works offline | Yes | No |
| Private footage | Safe | Think first |
Both options are offered when you generate captions, and the app says plainly which is which: "Transcribed on this iPhone. Your audio never leaves the device." versus "Transcribed by Apple's best model, so your audio is sent to Apple."
Pick on-device for anything sensitive, anything under embargo, anything involving other people's children. Pick the larger model when the audio is a strong accent and the content is not sensitive.
Step 1: Open the project and choose the spoken language
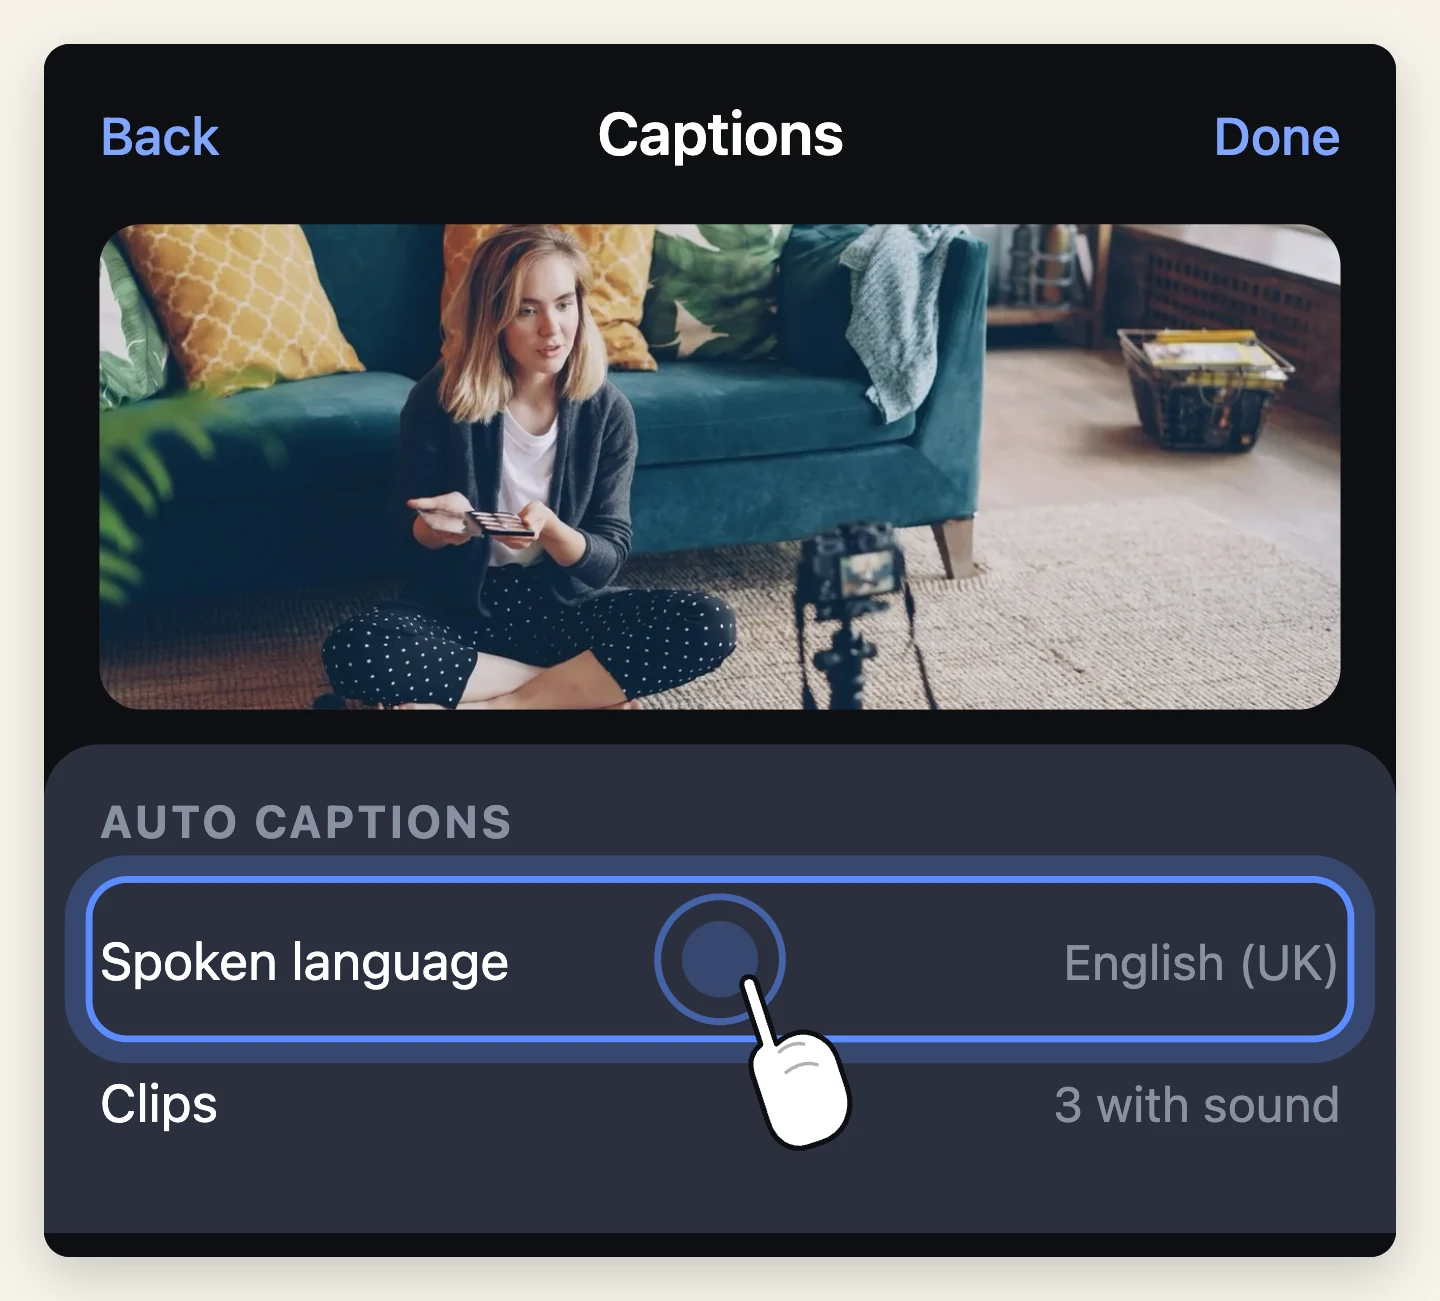
In Muse or Moments, open the project and find the captions panel.
Set Spoken language first. This is the most common cause of a transcription that comes back as gibberish — the model was listening for the wrong language and did its best anyway. It does not auto-detect, and it should not guess.
If your clip has no dialogue at all, there is nothing to transcribe. Captions are written from the audio.
[Screenshot: Auto captions panel — spoken language selector and the two transcription options]
Step 2: Generate the captions
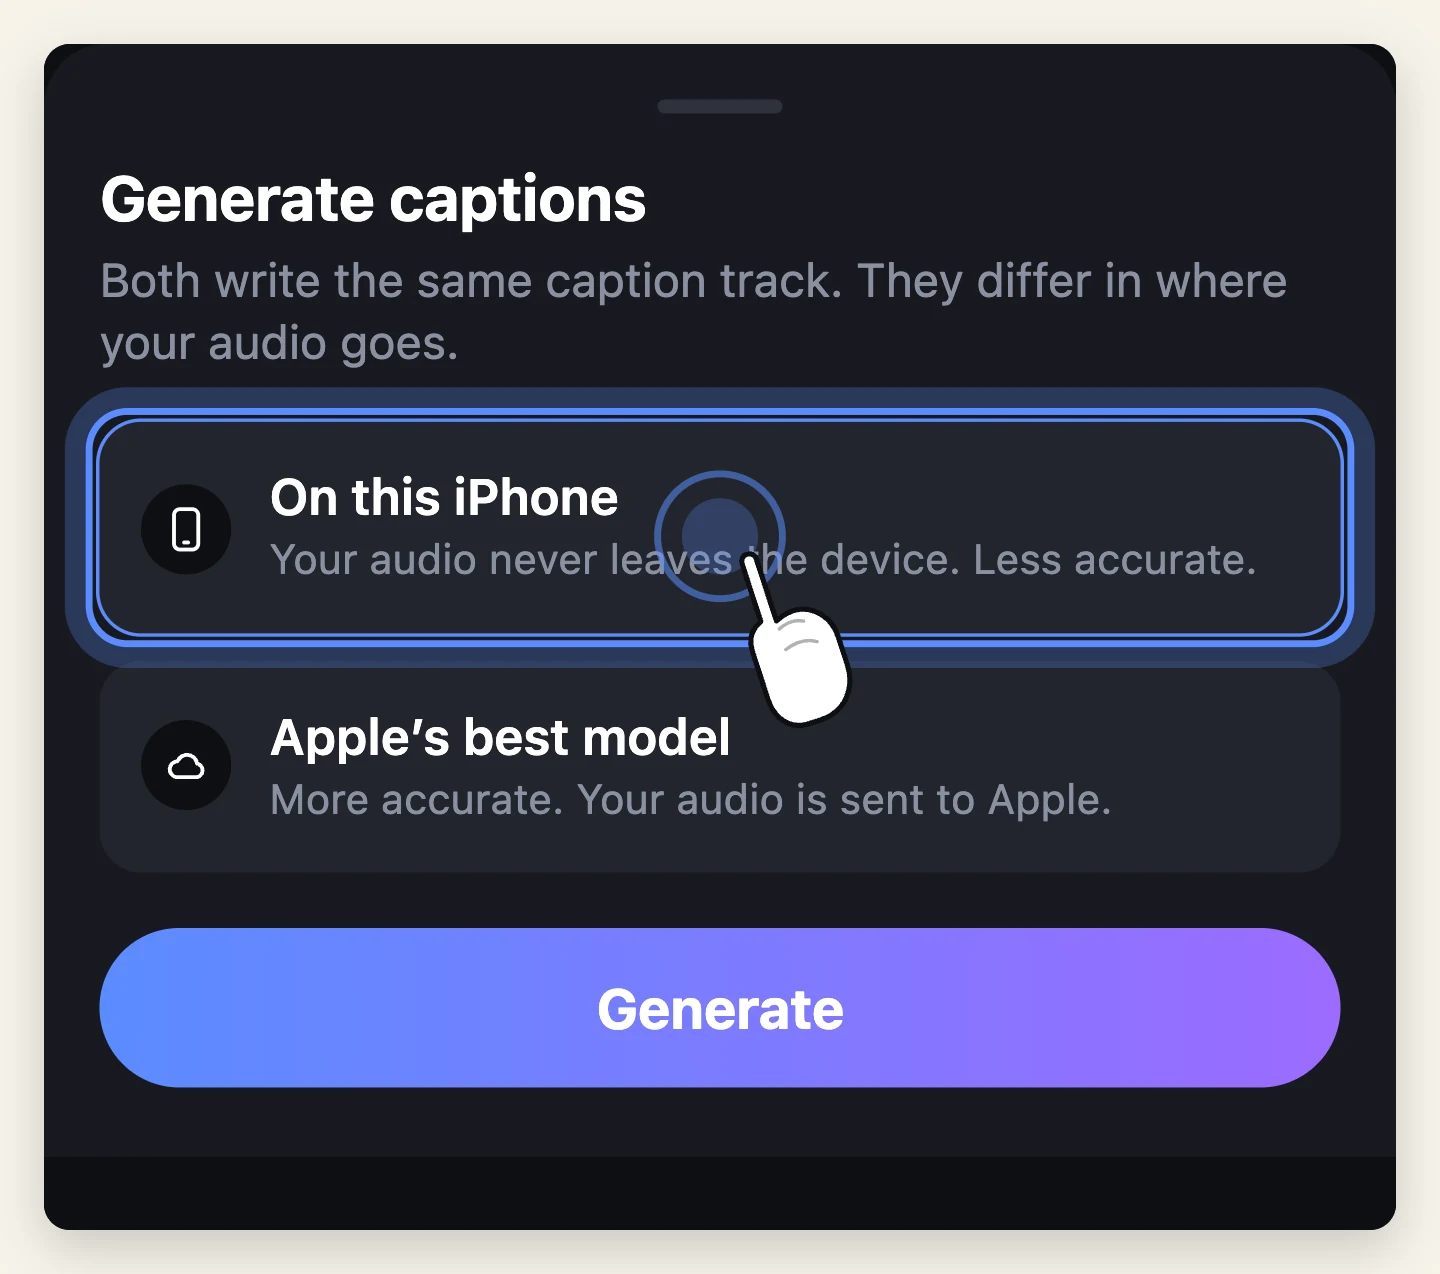
Tap Generate captions and choose on-device or Apple's model. The lines appear on the timeline as a caption track, timed to the speech.
Auto captions are free. There is no paywall on the transcription itself — only the full font library is part of Pro, and you can style captions perfectly well without it.
Step 3: Fix the words the model got wrong
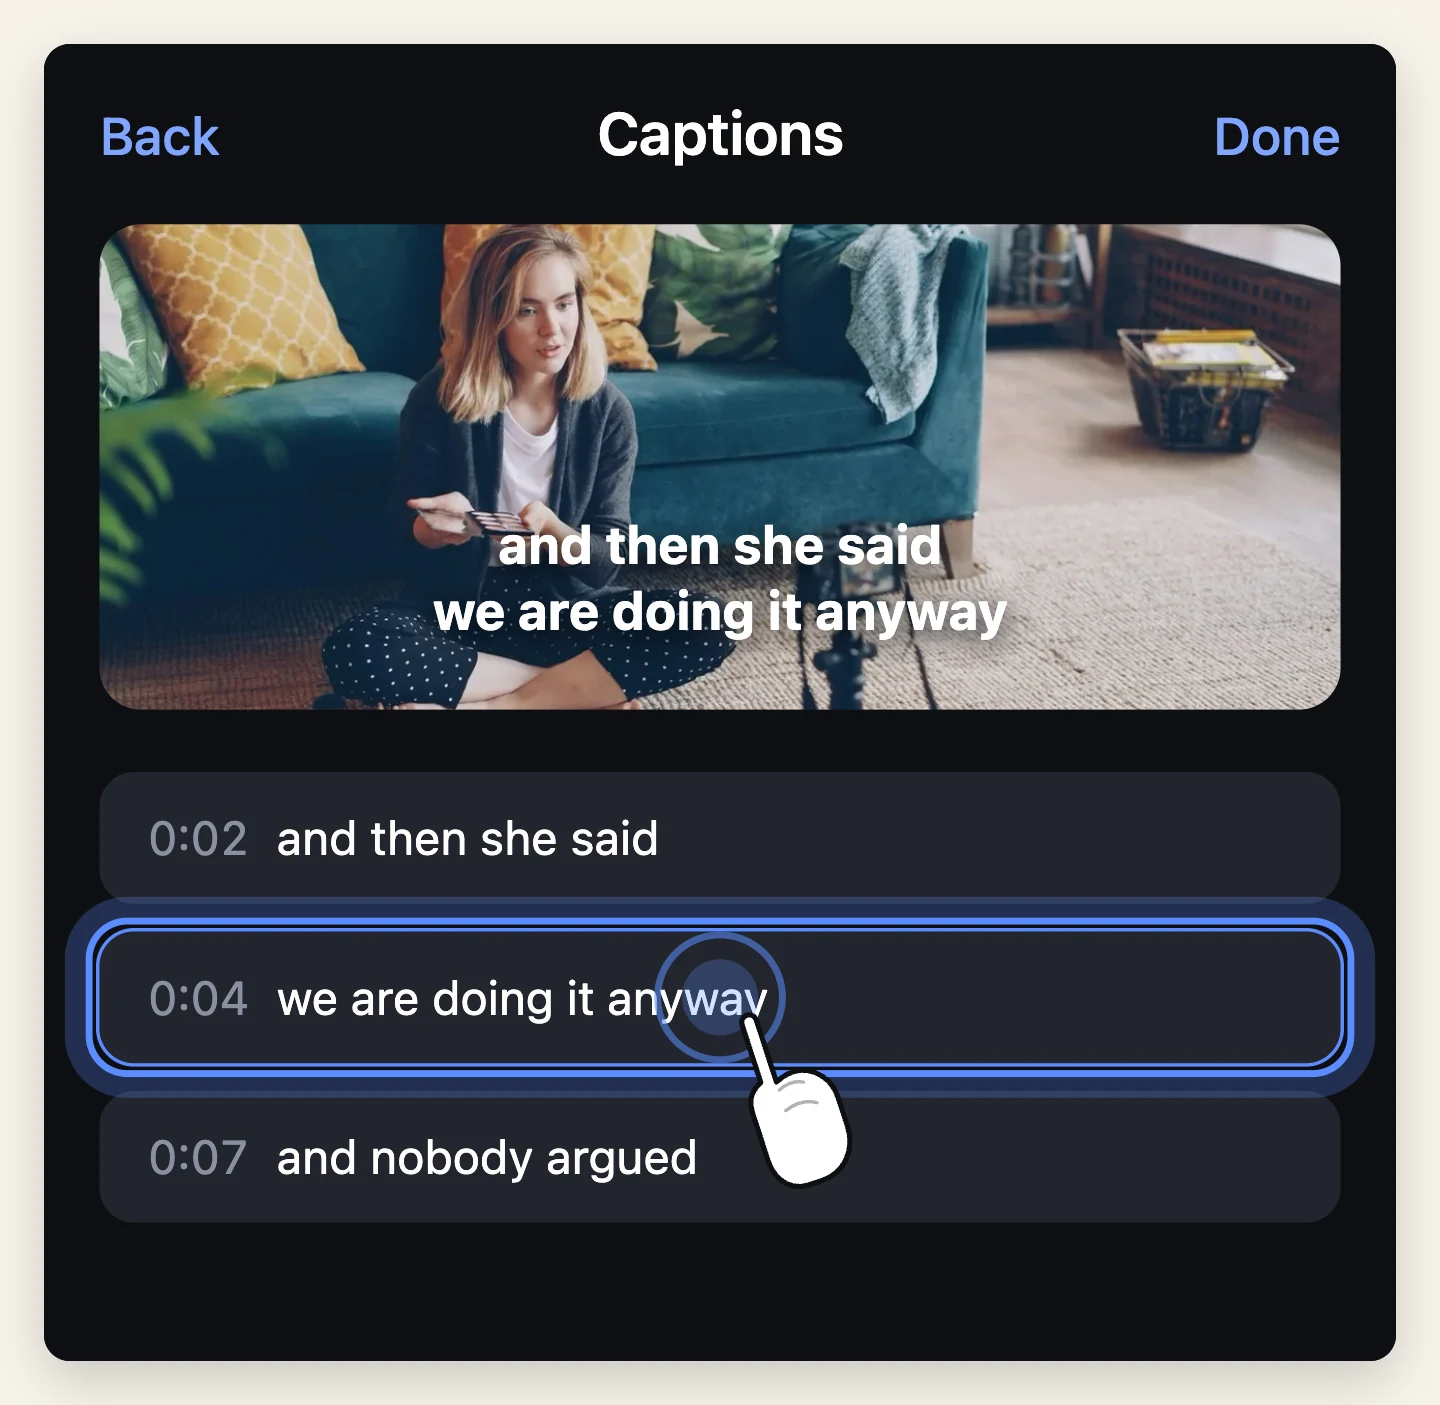
No automatic transcription is correct first time, and anyone claiming otherwise has not tested one on real speech. Every line is editable, and you should read every one.
The errors cluster predictably:
- Names. Place names and people's names are the first thing to go
- Jargon. Product names, brands, anything invented
- Strong accents and dialect. The app warns about this directly — "Strong dialects are hard to transcribe and results vary." Speaking closer to standard helps at record time; editing fixes the rest
- Numbers. "Fifteen" and "fifty" are a coin toss in fast speech
- Where one line ends and the next begins. Technically correct, badly split
Read them against the audio once, start to finish. On a 30-second clip this takes about a minute, and it is the difference between captions that help and captions that embarrass.
If every line is wrong rather than some, stop editing. Check the spoken language is right, and that the clips actually have sound. That is almost always the cause.
Step 4: Style them so they are actually readable
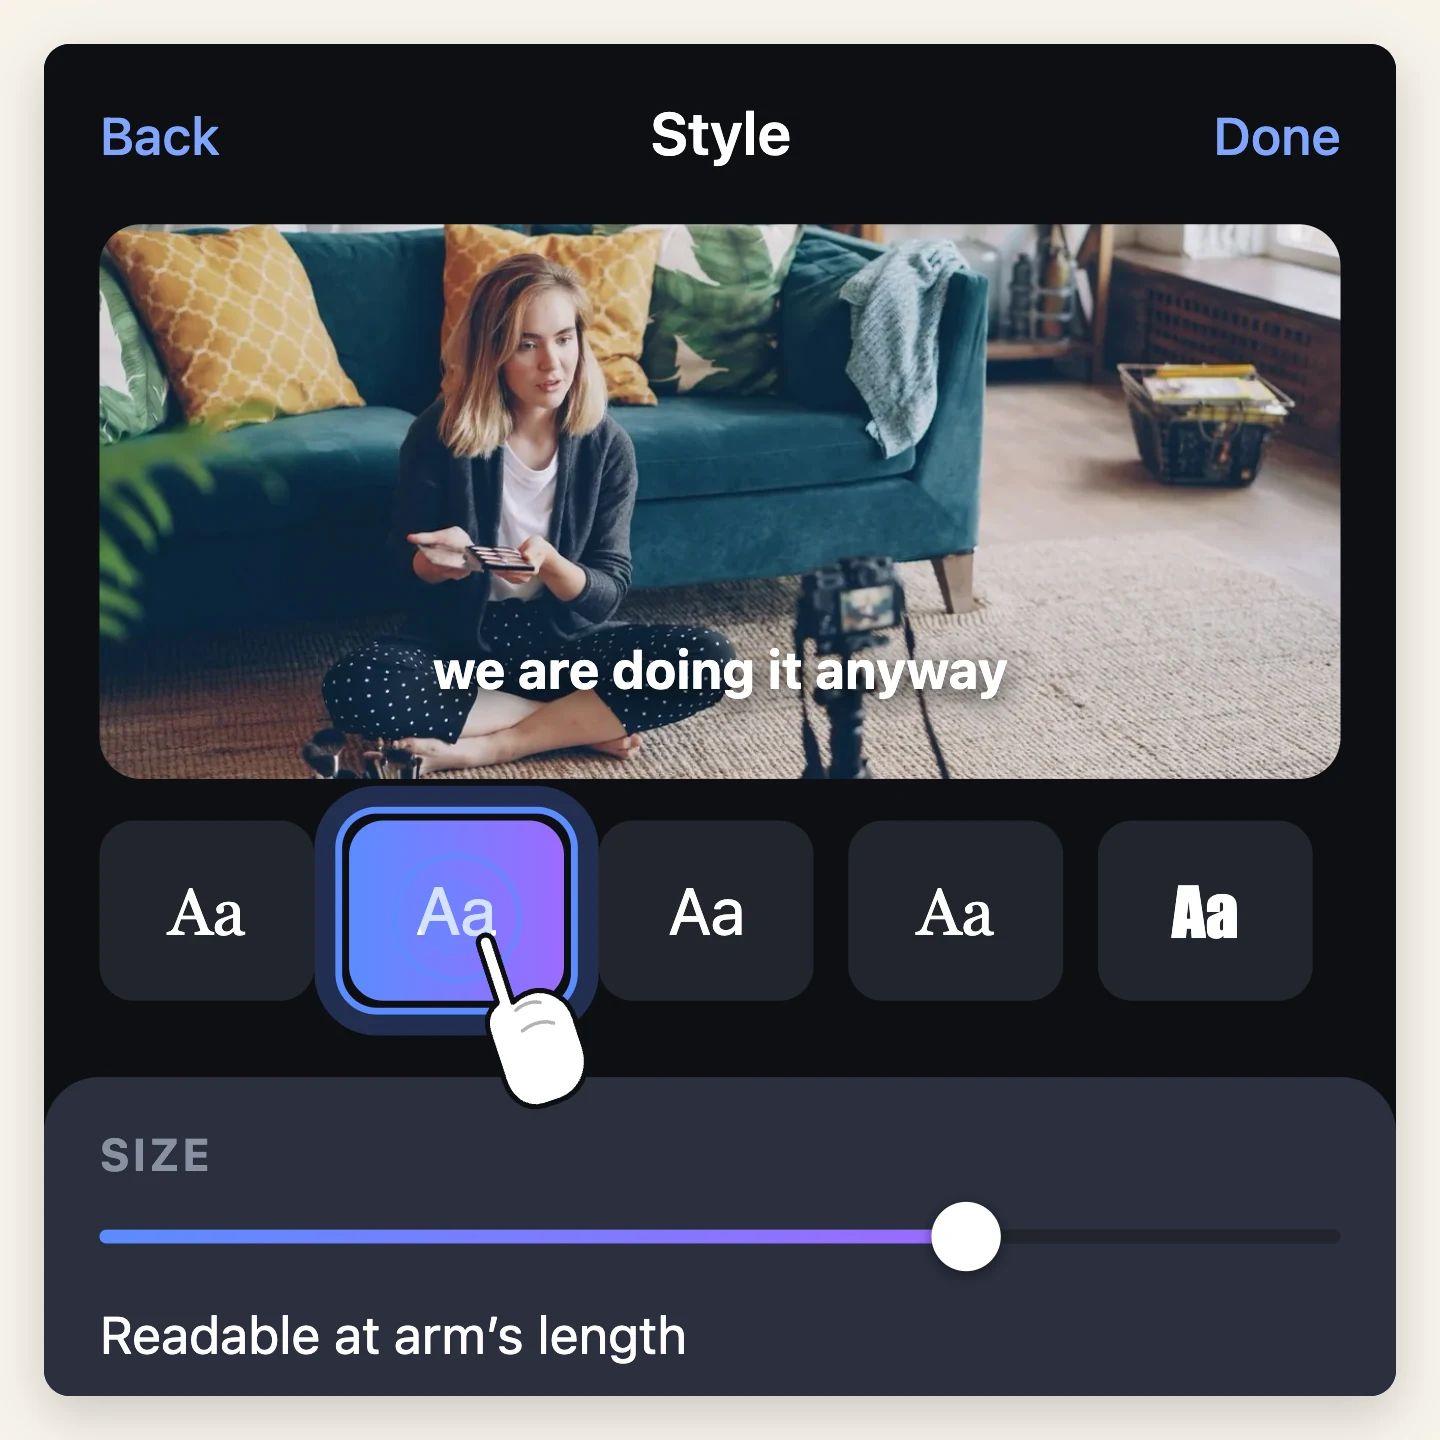
Default captions are legible. Good captions are read without effort. Three things carry almost all of it:
- Size. Bigger than feels right on your own screen. You are designing for a phone held at arm's length on a bus
- Contrast. Light type on dark footage, or dark on light. If the footage changes brightness under the text, the text needs its own backing
- Line length. Two lines maximum, and break them where the sentence breaks, not where the box happens to end
With Pro you get the full type library — 46 fonts with size, colour and alignment. Without it you still have everything that matters for legibility.
If you need to move the whole caption track slightly earlier or later against the audio, you can shift every caption together — their spacing stays as it is, so one adjustment fixes a global drift without re-timing each line.
Step 5: Keep them out of the interface
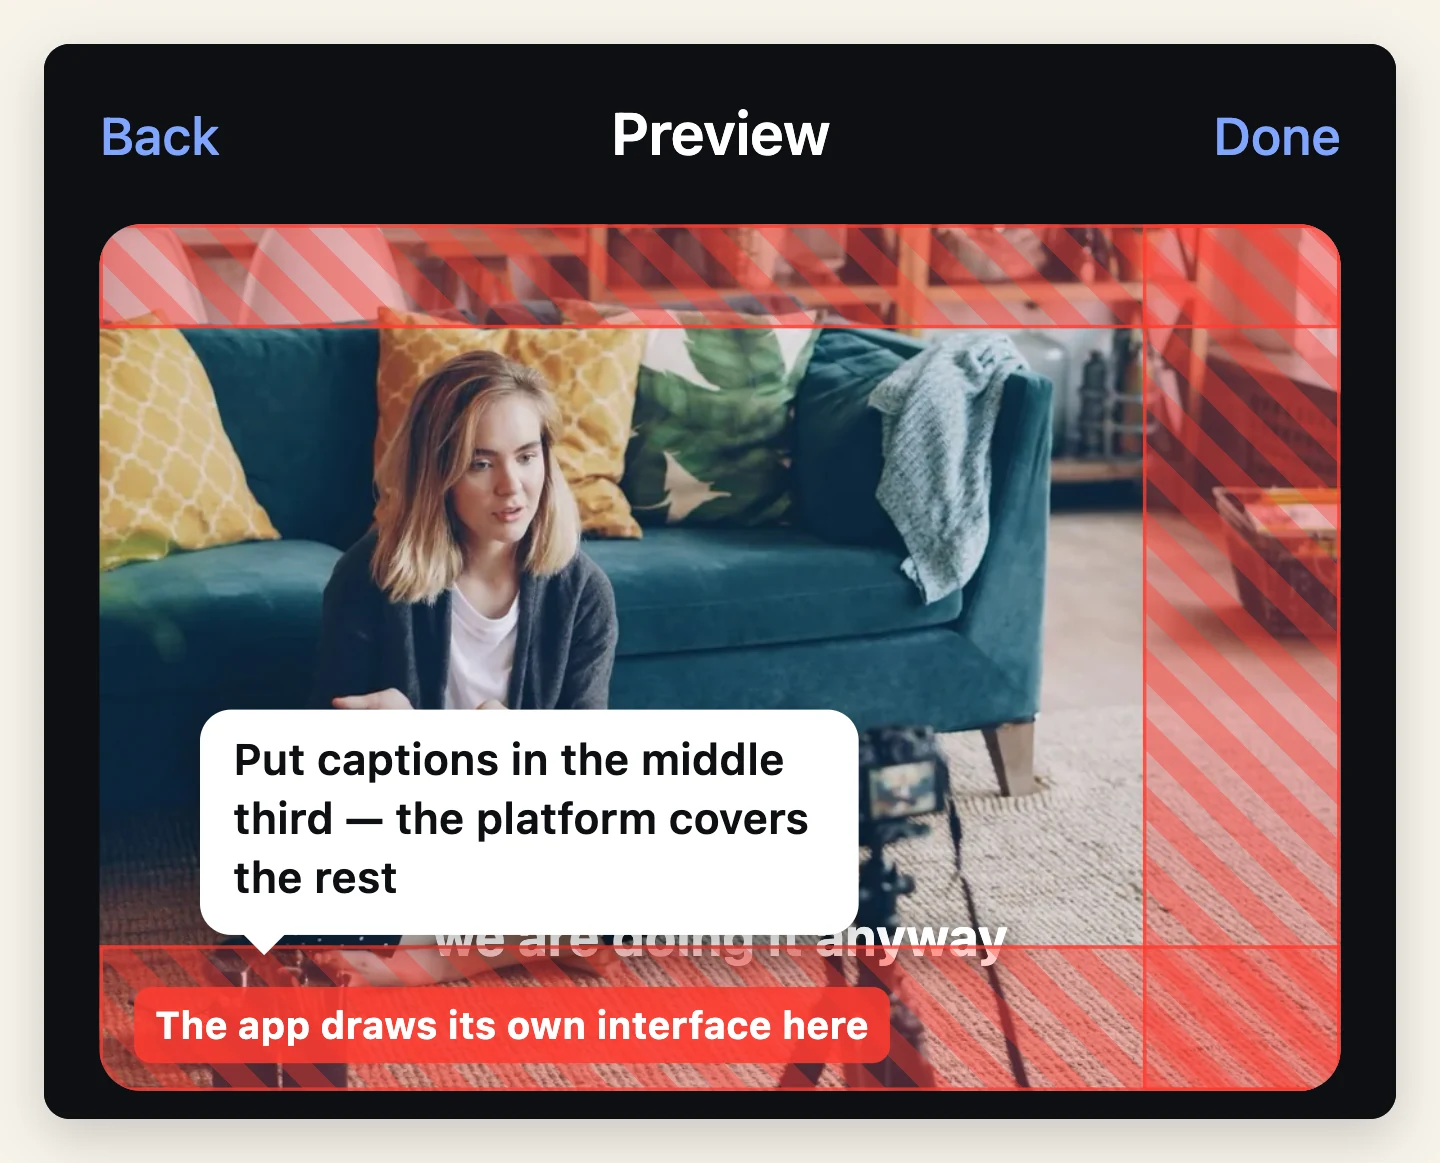
This is the step most guides miss entirely, and it ruins more captions than bad transcription does.
Every platform draws its own interface on top of your video: usernames, caption text, the like and share column, the progress bar.
- TikTok covers the bottom roughly 15% and a column down the right
- Instagram Reels covers the bottom and the right
- YouTube Shorts covers the bottom and the right
Put your captions in the middle third, horizontally centred, nudged slightly above centre. Not at the bottom, where the platform will bury them. Preview on the actual app before you consider it finished.
Adding more clips later
If you add footage to a project that already has captions, you do not have to redo the whole thing. The app offers "Caption only the new clips", which leaves your edited lines alone and transcribes just what you added.
That matters more than it sounds. The cost of captioning is in the proofreading, and nobody wants to do it twice.
When automatic captions are not good enough
Be honest about the limits:
- Several people talking over each other. No automatic system separates speakers reliably
- Heavy background music or noise. The model is hearing what you are hearing
- Legal, medical or safety content, where a wrong word is a real problem. Transcribe by hand or have it checked
- Languages you do not read. You cannot proofread what you cannot read, so you are publishing something unverified
For everything else — a talking-head clip, a vlog, a product walkthrough, a recipe — automatic captions with a careful read-through take about two minutes and are indistinguishable from hand-typed ones.

Moments
Photo movies set to music — the app this guide is written for.

Free to try. Nothing to sign up for.